Digital Storytelling and Stories with the iPad
I often think of digital storytelling as something done in first person because it creates that personal connection. Whereas, I think of a digital story as an anecdote or story typed or narrated in third person.
 |
| Image attribution: Lyn Hilt's Slideshare, used with permission. Original work: "Writing- Pen & Paper" CC-by Laurie Richie |
Here are some of the many benefits of digital storytelling and digital stories:
- The 21st century skills and ISTE's Standards applied are critical and creative thinking; written, oral, and digital communication; collaboration; authentic learning; digital fluency; informational fluency; and project management.
- It is great differentiation for all students including ELs, gifted, and special needs.
- It increases student engagement in a meaningful and relevant task.
- It can be used as an authentic assessment.
Common Core Standards
Many specific content standards can be addressed through digital stories. Here are some of the Common Core Standards that digital storytelling and digital stories address:
- CCSS.ELA-Literacy.CCRA.W.6 Use technology, including the Internet, to produce and publish writing and to interact and collaborate with others.
- CCSS.ELA-Literacy.CCRA.W.3 Write narratives to develop real or imagined experiences or events using effective technique, well-chosen details and well-structured event sequences.
- CCSS.ELA-Literacy.CCRA.SL.4 Present information, findings, and supporting evidence such that listeners can follow the line of reasoning and the organization, development, and style are appropriate to task, purpose, and audience.
- CCSS.ELA-Literacy.CCRA.SL.5 Make strategic use of digital media and visual displays of data to express information and enhance understanding of presentations.
- CCSS.ELA-Literacy.CCRA.SL.6 Adapt speech to a variety of contexts and communicative tasks, demonstrating command of formal English when indicated or appropriate.
- CCSS.ELA-Literacy Language.6.3b Maintain consistency in style and tone.
- CCSS.ELA-Literacy Language.3.a Choose words and phrases for effect; and, L.4.3a. Choose words and phrases to convey ideas precisely.
- CCSS.ELA-Literacy.CCRA.R.6 Assess how point of view or purpose shapes the content and style of a text. Or CCSS.ELA-Literacy.CCRA.SL.3 Evaluate a speaker’s point of view, reasoning, and use of evidence and rhetoric.
Types of digital stories and some prompts
Digital storytelling and stories can take shape as a:
- Short Story: This narrative shares an insight, a perspective, or an entertaining story.
- Myth, Legend, Tall Tale, Folk Tale, or Fable: While each of these are a little different from one another, they tend to describe origins, values, beliefs, accomplishments, or special events.
- DocuDrama or Historical Storytelling: This digital story is told from the point of view of a person (or object) in a different era. It requires researching a time period, then using creativity to have those facts come to life.
- Describe and Conclude or Reflective Storytelling: Tell about something you're learning and the impact it has on you.
- Public Service Announcement, Advertisement, or Persuasive Story: This digital story has the purpose of calling others to action for or against something else.
 |
| These prompts were inspired by Bernajean Porter's Digital Storytelling Across the Curriculum |
The art of digital storytelling
Last year, I participated in an outstanding webinar by ISTE's Special Interest Group for Digital Storytelling, where Bernajean Porter shared about the "Art and Soul of Digital Storytelling." After being inspired by the webinar, I created the following page summarizing some of my key take-aways:
 |
| Click here to download PDF |
Below is an example of digital storytelling by Siobahn Quigg.
Step 1: Writing the script and planning the project
 |
| Click to download |
- Prompt: I'd choose one prompt to introduce the process of digital storytelling to students. I might even do the first one as a whole group with parts and roles shared by the students. (Here's the first try from a second grade class and a Kindergarten student). As our class becomes confident with the process and media, I'd open it up to more choices and smaller groups/individual productions.
- Graphic organizer: The type of graphic organizer (storyboard) I choose depends on the prompt they'll use.
- Teaching about the writing: Teach the importance of first person for adding spice to the story; share an interesting problem, perspective, or insight; and use strong word choice to convey the message.
Step 2: Production, apps, and digital tools
- Choose the app: When I am introducing the digital storytelling process to classes, I choose the app for them to use. Once the process is established and they have a toolbox of apps (or sites) to use, I give them a choice in tools.
- Images and Creative Commons: Have students create their own images, take their own photos, or find photos that have Creative Commons Licenses and have them properly cite the photo either on the same page as the picture or at the end.
- Background music and Creative Commons: If there is not music to choose from on the app or site, then find music that is legal to use in your video. I select music from the list suggested by Creative Commons, Dano Songs, or Melody Loops. However, background music is not a necessity, especially if it's new to the class.
- Production: Before production, I treat this part of the process much like I would the rough draft of a writing assignment with editing and revising. Here's where the mini-lessons come in about voice, word choice, etc. I like to conference with my students to make sure they are ready for production, then I allow them to start once they've gathered all of the photos and music (optional).
Apps
I'm highlighting five apps appropriate for various ages and for beginners (with integrating the iPads and/or are new to digital storytelling). These apps are also currently free.
- Fotobabble: The Fotobabble app makes narrating, editing, and sharing a single photo easy. While there are several sharing options, including email, I've found that saving in the Fotobabble app is easiest because it can be opened at the desktop site (once an account is created) and shared with others via the embed code on a website/blog or by the URL. The drawback of this app is it only allows one image. Therefore, if the student wants to show more images, a collage of images can be created.
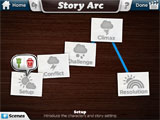
 Toontastic is a cartoon storyboard for recording digital stories. This is a great app to apply creativity, speaking and listening, with narrative elements. With this app, once you tap Done, it has the
"Share this cartoon online on ToonTube" checked. To utilize this, create an
account from the iPad. You'll get an email from Toontastic
for everything created in Toontastic on your iPads (if you log into
them on the iPads), and you'll give the final approval to publish their
creations. On that page, there is also an embed code for your blog/website (and options to email, Tweet, or share it on
FaceBook).
 - TeleStory allows you to star in your own TV show. You are given prompts and props to walk through a storyboard, creating a story. Click here to view this app in iTunes.
- ShowMe is an interactive whiteboard that can be used for digital storytelling by adding pages to the presentation and inserting photos (or drawing your own). ShowMe is an iPad app that can also be accessed from your browser. Once saved as "Complete" on the iPad, it will save to the account created which gives options for sharing, including the URL and the embed code.
More resources
- Bernajean Porter created a list of apps with more options.
- Silvia Rosenthal Tolisano created a list of more resources for both the iPad and desktop computer.
- Alec Couros has resources and examples posted on his Open Thinking Wiki.
- Shelly Sanchez Terrell has oodles of resources at her Teacher Reboot Camp.
Step 3: Publishing and connecting with an authentic audience
Celebrate their creations by sharing with others.
Building an authentic audience to view the digital stories is powerful for students. They are no longer creating a project just for the teacher -- it's for their families, friends, and people around the globe.
Each of the apps listed above have a description for sharing on the Internet. Emails can be sent to parents with the URL for where the digital story is published (or through the RSS subscription for the class blog). When shared on a teacher's blog, a Tweet can also be sent through Twitter asking for comments on their work by adding the hashtag #comments4kids. If your school has a FaceBook account, share the link there.
Reflection, evaluation, and rubrics
Providing specific feedback along the way with daily goals is part of the process. Self-evaluations using the scoring guides or rubrics are strong formatives for the students to target their next steps.
Formal or informal student reflection is part of the process. It's important that a positive class atmosphere is established for this step.
- Asking reflective questions: Have partners share their work with one another and ask them, "What parts or images captured your interest or attention?"
- Wows and Wonders Gallery Walk: Have students walk around to visit peers' work and give them sticky notes to leave a specific "Wow" or a praise and a "Wonder" statement.
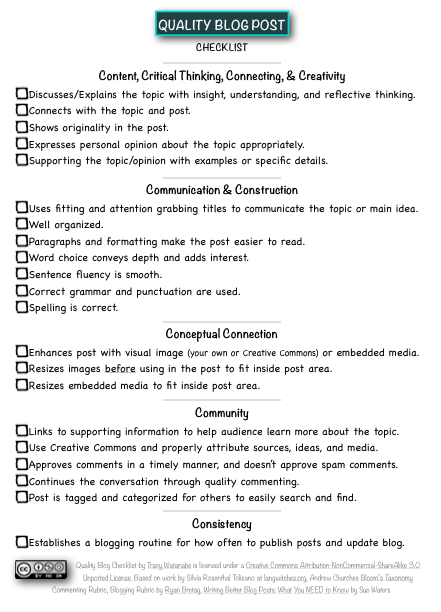
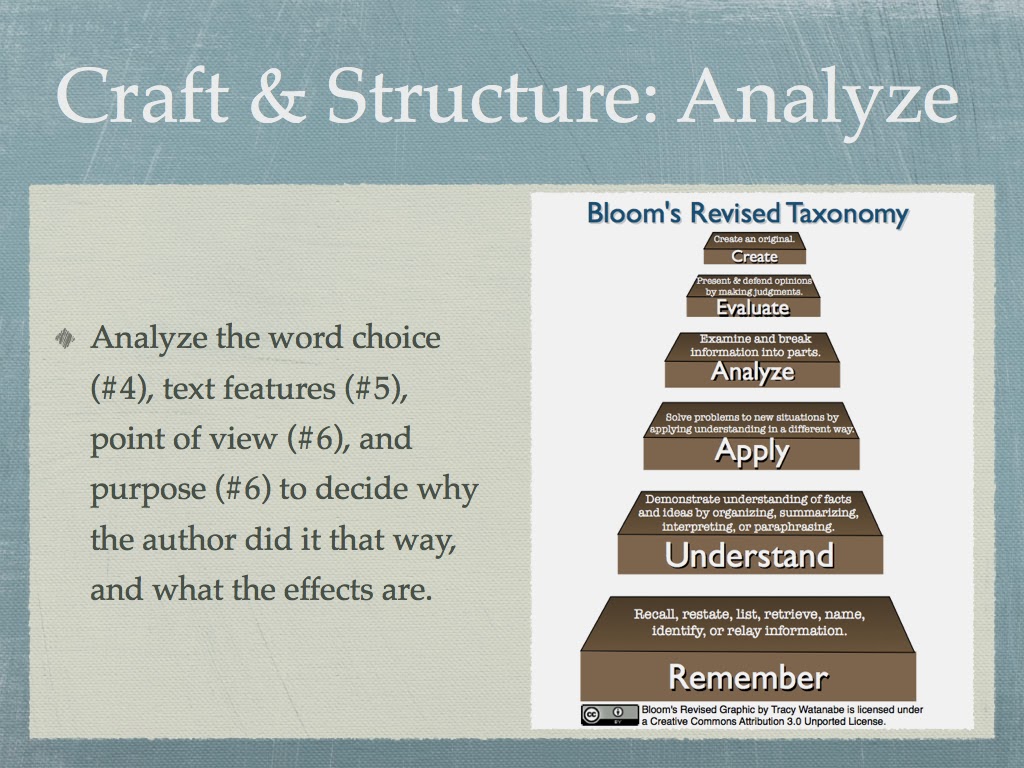
- Tracy's Rubric: This rubric was created as an introduction to storytelling, with the purpose of focusing on Common Core Reading Standard #6, "Assess how point of view or purpose shapes the content and style of a text," by applying it to digital storytelling.
- Digital Storytelling Rubric: I discovered Jason Ohler's post about assessing digital stories from Lyn Hilt's wiki. This is an extensive list of ideas on assessing digital storytelling.
- Create your own rubric: If you end up creating your own rubric, remember to focus on your content standards the most with only a little emphasis (if any) on the technology piece.
Final thoughts
Digital storytelling is fabulous for content learning, 21st century learning, and active engagement. If task predicts performance, then my money is on digital storytelling.
- What apps or digital resources would you add to this list?
- What tips or questions would you add to this conversation about digital storytelling?
- How else does this post connect with you?
Portions of this post was originally published in 2013 and as part of AJUSD professional development with netbooks.


Hi Tracy,
ReplyDeleteThank you for this extensive post filled with such wonderful resources and suggestions. One particular resource I found especially interesting was the Educational Leadership article on "Feedback". Two things resonated with me: One was the idea of Feedback vs. Advice. And another was this quote: "less teaching and providing more feedback can produce greater learning". I will review this in greater detail, but on the outset it makes me reflect on the type of feedback (or advice) I am sharing with my students. The 7 Keys to Effective Feedback not only applies to digital storytelling but to all areas.
Your post also made me think of the various tools that I need to START using. We have access to several Chromebooks throughout the day and the students would love to try using some different tools.
One App that is a HUGE favorite with our students is "Write About It". It pairs writing prompts with pictures and varies the writing activity: Write a story, a list, a song etc. Students can even add their own pictures and prompts for others to try! While it is not free, it is definitely worth the $2.99 price tag.
Thank you Tracy for providing a thoughtful post that allows me to reflect on my own practice.
Best,
Nancy
Dear Nancy,
DeleteAs always, I value the insight you share. The article,
Seven Keys to Effective Feedback by Grant Wiggins, goes back to what I know him best for -- Understanding by Design or the Backwards by Design plan -- and start with the end goal in mind. If that end goal is clear, and how it will be assessed is determined, then providing insightful feedback rather than advice will be more likely. So in the context of digital storytelling, defining the goals of the digital story and creating that rubric prior to starting the project is a priority. Furthermore, the goal and rubric must be shared with the students.
I appreciate your sharing the "Write About It" Chromebook App. That's one of my upcoming research projects -- finding Apps or sites for digital storytelling/stories with Chromebooks.
Thanks again for commenting to continue the discussion.
Kind regards,
Tracy
Tracey, just found your bog today! Great resources for digital storytelling! I am going to figure out this summer how much of digital storytelling I can do with just two student computers in the room. Excited! Thank you!
ReplyDeleteHi Jaana,
DeleteSo glad you found my blog! I hope it provides some ideas that will help you. There's so much you can do with only two computers! If at least half of the time is spend with the writing/editing/revising process, then students are often times ready at different times to use the hardware.
If your students are working collaboratively in small groups, then that helps with access to the hardware.
I've also found that if I spent time investing in my first group or two with the tools, then they became the student-experts to help train the next group(s). If they had questions that the student-experts couldn't answer, then they'd come get me.
The beauty of the student-experts is it gives them a reason to learn it beyond creating their own product, but it also gives them a voice and a leadership role. They're using their communication and collaboration skills, while also working with IT skills. At the same time, it frees me up to work on the editing/revising with other students. I am able to discuss voice, word choice, etc. Win-Win!
Hope that helps!
Kind regards,
Tracy
I am updating this post since some of the links were broken. I'm also updating the tools that I'm showcasing. Educreations was one of the tools on the original post. I've taken this one off and replaced it with ShowMe due to some of the changes with the update. Click here for the archived post.
ReplyDelete